Sunday, April 4, 2010

Crafting on the final days of Passover

For today's post to my By Hand blog I've crafted something that's in every Jewish kid's arsenal during Passover: Matzo Pizza.


Pictured above is all the ingredients I used:
- Matzo
- Dave's Gourmet, Organic Pasta Sauce
- Organic Valley Shredded Cheese, Mexican Blend

After splitting the two pieces of Matzo in half, I applied the pasta sauce.


Next, the shredded cheese is place on top of the sauce (pictured below).


The matzo pizza is placed in the oven (at 400°) for just a few minutes until the cheese starts to melt.


The end product is a tasty snack that I have mad at least six or seven times during this current Passover holiday.

The End Product:


Going back to my post from last week, I was very happy I could revert back to the original intention of this blog's purpose: to explore organic recipes while adding to my own personal cooking repertoire. This week I was able to introduce organic ingredients to a recipe I was already familiar with. I have to report that the ingredients made all the difference! In the past, when I have made Matza pizza with whatever I could find around my house, I have always ate my creation without any complaints. But to go out beforehand to Bloomingfoods and specifically purchase organic ingredients, I felt a certain and different sense of accomplishment when I created this dish throughout the week...not too mention the results tasted great! In the upcoming weeks, I look forward to creating more organic dishes.

Sunday, March 28, 2010

Passover on my mind

With the Jewish holiday of Passover starting tomorrow evening, I decided to get into the festive mood by creating traditional Matzah balls for a Matzah ball soup. I felt that it would be a great to display a sense of my own heritage while also adding to my By Hand repertoire.

Here is the ingredients given from this product:


- 2 tablespoons vegetable oil
- 2 large eggs, slightly beaten
- 1/2 Matzah meal
- 1 tablespoon kosher salt
- 2 tablespoons soup stock

First I blended the vegetable oil, eggs, Matzah meal and salt together. After that was completed, I added the soup stock. After sitting in the refrigerator for 15 minutes (as instructed in the recipe), this is what my Matzah mixture looked like:


(Doesn't necessarily look the most appetizing at this point...but it gets better)

The next step was to form the mixture so that the Matzah meal can take its traditional ball-like shape.


Nextly, the Matzah balls cooked in boiling water for about 30 minutes.


Overall, I really enjoyed making this dish. Not only was I extremely happy with the final outcome of the Matzah balls, but I really felt a sense of accomplishment through my cooking skills that I haven't really obtained otherwise. Perhaps for me, crafting something that is of significance to my own cultural background has led to a better appreciation of the food I'm making.

Here is the final outcome:


With the addition of broth, chicken, and some vegetables this will make a delicious Matzah ball soup for this upcoming Passover!


P.S. I know originally this By Hand Blog was supposed to cover organic recipes and lately I've gone away from that. On the other hand, I have heavily shifted my research project on the political expression that come from both the organic and DIY movements. In the near future, I will want to resolve this issue and see how my blog can better assist me in research efforts.

Sunday, March 7, 2010

On Today's Menu: Hummus

For this week's attempt to add to my By Hand project, I decided to make one of my favorite appetizers: hummus.

Here is a ingredient list for hummus that I found on the internet:

- 4 garlic cloves, minced and then mashed
- 1 15-oz cans of garbanzo beans (chickpeas), drained and rinsed
- 2/3 cup of tahini (roasted, not raw)
- 1/3 cup freshly squeezed lemon juice
- 1/2 cup water
- 1/4 cup olive oil
- 1/2 teaspoon of salt

Here are my ingredients at the prep stage:


Here are the preparation instructions provided by the website:

- In a food processor, combine the mashed garlic, garbanzo beans, tahini, lemon juice, 1/2 cup water, and olive oil. Process until smooth. Add salt, starting at a half a teaspoon, to taste.

After I read the instructions, I immediately ran into a problem. Since I am not at home, I did not have access to a food processor. The best I could make do with in my college apartment was a blender. Having to make do with what was at my disposal, I was reminded of the idea of Yankee Frugality in Rachel Lawrence's "Making Do: The Aesthetics of Frugality," which we talked about extensively in class.

Here is a picture of all my ingredients being mixed into the blender: (Trust me, the finished product taste better than it looks!)


After I used the blender in place of the food processor, I could definitely see the disadvantages of using the blender. From the picture above, it was obvious that I perhaps pulverized my ingredients a little too much. Perhaps, if I had access to a food processor my ingredients would have been handled in a more gentle fashion. Nonetheless, I was still a able to get a good amount of hummus from the bottom of the blender.

The finished product:


In the end, my hummus turned out to be the perfect afternoon snack!

Sunday, February 21, 2010

1st Attempt=SUCCESS!!


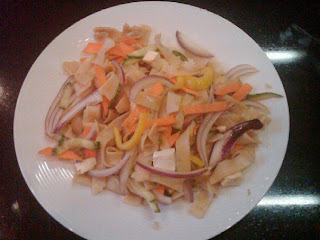
This past weekend I went home for a family engagement. Since it was the first time that I had a full kitchen at my disposal, I decided that it would be a good time to get started with the cooking portion of my By Hand project. For this first attempt at cooking an organic meal for the context of this class project, I thought I would do something simple and that I have had some success with in the past. Therefore, I felt most comfortable cooking a vegetarian Pad Thai dish.

Here is the Ingredient List I found online for a vegetarian Pad Thai dish:
1 (12-ounce) pack dried rice stick noodles (sen lek)
6 eggs
1/4 cup vegetable oil
2 tablespoons smashed garlic
2 tablespoons finely chopped onion
1/2 cup red bell peppers
1/2 cup green bell peppers
1/2 cup ground peanut
1/2 cup soy sauce
1/4 cup sugar
2 teaspoons Thai pepper powder
1 cup fresh bean sprouts, for garnish
1/4 cup shelled peanuts, for garnish
2 tablespoons chopped fresh cilantro leaves, for garnish

Early on Saturday morning I was able to attend a local farmers' market in Dayton, Ohio and picked up some of the ingredients needed for my dish. These ingredients included the garlic, peppers, and cilantro. At the suggestion of my girlfriend, I also picked up some freshly made tofu to provide some extra texture to the dish. At my own discretion, I also added sauteed onions and carrots to the dish to create more color.

Overall, I was fairly happy with the outcome of my dish. This was the first time in over a year that I have applied myself in terms of cooking and crafting a complete dish. I look forward in the upcoming weeks to creating more meals for this project.

Sunday, February 14, 2010

Reflections gained from the Winter Famers Market


As an alternative to the upcoming ArtsWeek assignment, yesterday I had the opportunity to visit the Bloomington Winter Farmers Market, which is hosted by the Local Growers Guild. Since my By Hand project focuses on the craft of organic cooking I decided to focus this week's blog entry on my experience with the local growers at the market. I was amazed by the wide variety of items for sale at this market given it is the winter growing season. In terms of the produce I saw there was lettuce, radishes, cabbage, herbs, carrots, parsley and beets. There were also some other specialty items such as maple syrups, salsas, persimmon pulp, jams, and ravioli.


While at the Farmers Market I also had the chance to learn more about the Local Growers Guild. The Local Growers' Guild is a cooperative of farmers, retailers and community members dedicated to strenghthening the local food economy in Southern Indiana through education, direct support and market connections. Everyone who had a booth at the Winter Farmers Market is a member of the guild. The most important thing I noticed about the Local Growers Guild is the sense of community that is fostered between the vendors. There is definitely a strong camaraderie between each seller at the market.

Yesterday at the Winter Farmers Market I purchased some fresh cilantro, spinach, as well as some collared greens. For next week I look forward to incorporating these ingredients into a dish. I'll make sure to take photos to document my progress.

Sunday, February 7, 2010

Recipes, Pt. 2


Here is another recipe that I hope to try out in the next couple of weeks.

Italian Vegetable Salad

* 1/4 lb. cooked rotini pasta
* 5 ounces Eat Smart® vegetables, (any blend)
* 1/3 cup plus 1 Tbs. Italian dressing
* 1/2 medium tomato, chopped
* 3/4 green onion, sliced
* 2 ounces reduced-fat feta cheese
* 1/3 cup plus 1 Tbs. green, red or yellow bell pepper, chopped
* 1/2 cucumber, peeled, seeded and chopped
* 3-1/4 Tbs. Kalamata olives
* 2-1/4 Tbs. fresh parsley, chopped
* 1 Tbs. plus 2 tsp. oil-packed sun-dried tomatoes, chopped
* 1/8 tsp. salt
* 1/8 tsp. ground black pepper

Cook pasta according to package directions. Drain and cool. Set aside. Bring a large pot of water to a boil. Add Eat Smart® vegetables and cook for two minutes or until slightly tender but still crisp. Drain and rinse with cold water. In a large bowl, mix pasta and Eat Smart® vegetables with 1/2 cup of dressing. Refrigerate for 2-4 hours to marinate. Add remaining ingredients. Mix and serve.

Recipes


Listed are a few of the recipes that I am eager to try out over the next few weeks. My only hope is that my results can look half as good as the pictures shown with the recipes.

Stuffed Roasted Organic Chicken

Ingredients:

Stuffing:

1 onion, diced
2 cloves of garlic, smashed and chopped fine
1 pound zucchini or summer squash, grated
1/4 cup ricotta cheese
1 cup pine nuts
4 tablespoons soft butter
2-3 sprigs each of fresh marjoram, thyme and Italian parsley leaves chopped
1 egg
1 cup parmesan cheese
Salt and pepper to taste

Chicken:

One 3 to 3 ½ pound chicken or larger
1 sprig each thyme, parsley and marjoram leaves, chopped
2-3 tablespoons of olive oil
Salt and pepper to taste

Method:

1. Preheat oven to 400˚
2. Grate zucchini and salt it. Drain in a colander for 10-15 minutes to remove water.
3. Meanwhile heat 1 tablespoon of butter in a sauté pan and add onions and sauté for 30 seconds. Add garlic to pan and sweat onions with garlic until tender and translucent.
4. Rinse the zucchini and squeeze dry. Heat another ounce of butter in a sauté pan and sweat zucchini in butter. Let cool.
5. Combine the remaining ingredients in a bowl and salt and pepper to taste.
6. Cut the backbone from the bird with kitchen shears. Lay and spread flat on a a wood cutting board (wood cutting boards are the safest to use with meat), skin side up. Using the back of the knife strike the breast bone firmly, breaking the breast bone, collar bone, wish bone and the rib cage. Gently loosen the skin with a pairing knife around the breast, legs and wings to prep for stuffing.
7. Combine the herbs for the chicken in a small bowl and add the olive oil. Stir to combine.
8. Place stuffing underneath the skin of the chicken. Rub herbed olive oil all over the skin of the bird. Salt and pepper bird to taste.
9. Place chicken breast side up in a roasting or oven safe pan (like cast iron) and roast until internal temperature reaches 160˚, about an hour to an hour-and-a-half depending on the size of the chicken. Baste chicken as it browns.

_______